
How to install Snippet Box on Docker with Docker Compose
What is Snippet Box?
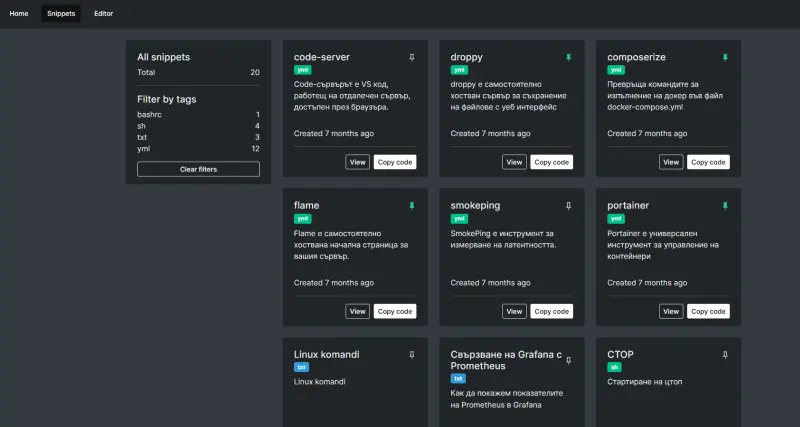
Snippet Box is a self-hosted application designed to organize your code snippets. It allows you to create, edit, view, and manage snippets across different programming languages. With built-in Markdown support, Snippet Box makes it easy to add notes or simple documentation to your code. It’s a valuable tool for developers who want to keep their code snippets organized in one place.
What is Docker?
Docker is an open-source software project that provides application containerization technology. It allows you to package software applications and all their dependencies into containers. These containers can run on any platform that supports Docker, ensuring that the application runs consistently regardless of where it’s deployed. Docker simplifies the development and deployment process by providing a consistent environment across different stages of development.
What is Docker Compose?
Docker Compose is a tool that simplifies the management of multi-container Docker applications. With Docker Compose, you can define and manage multiple containers as a single system. It uses a YAML file to configure the application’s services, networks, and volumes. Docker Compose makes it easy to deploy and manage complex applications that require multiple services.
Installing Snippet Box with Docker Compose
In this article, we will guide you through the process of installing and configuring Snippet Box using Docker Compose. Follow the steps below to get started.
Prerequisites
Before you begin, make sure you have the following:
- Linux server: You can use a physical server, a virtual machine, or a cloud server.
- Docker and Docker Compose installed: Ensure that Docker and Docker Compose are installed on your Linux server.
If you haven’t installed Docker and Docker Compose yet, please refer to the official Docker documentation for installation instructions.
Step 1: Create a directory for Docker containers
It’s a good practice to keep all your Docker containers organized in a specific directory. In this example, we’ll create a directory named “dockers” in your home directory.
To create this directory, run the following command:
mkdir ~/dockers
This command creates a new directory named “dockers” in your home directory. All your Docker-related files and directories will be stored here.
Step 2: Create a directory for Snippet Box
Next, we’ll create a specific directory within the “dockers” directory to hold the Snippet Box files.
Run the following command to create the directory:
mkdir ~/dockers/snippetbox
This command creates a new directory named “snippetbox” within the “dockers” directory. This directory will contain the Docker Compose configuration file for Snippet Box.
Step 3: Create the Docker Compose file
Now, navigate to the “snippetbox” directory and create a Docker Compose file named docker-compose.yml.
To create and open the file for editing, use the following command:
vi ~/dockers/snippetbox/docker-compose.yml
This command opens the docker-compose.yml file in the vi text editor. If you’re not comfortable with vi, you can use another text editor like nano or any text editor of your choice.
Step 4: Add content to the Docker Compose file
In the docker-compose.yml file, add the following content:
version: '3.3'
services:
  snippet-box:
    container_name: snippetbox
    ports:
      - '5212:5000'
    volumes:
      - '/root/dockers/snippetbox:/app/data'
    restart: always
    image: pawelmalak/snippet-box
networks:
  default:
    name: monitoring-net
    external: true
This configuration defines the Snippet Box service and its settings:
- version: Specifies the version of Docker Compose syntax used.
- services: Defines the services that make up the application.
- container_name: Sets a custom name for the container.
- ports: Maps port 5212 on the host to port 5000 in the container.
- volumes: Mounts the
/root/dockers/snippetboxdirectory on the host to/app/datain the container. - restart: Ensures the container always restarts if it stops unexpectedly.
- image: Specifies the Docker image to use for Snippet Box.
- networks: Configures the network settings for the service.
After adding the content, save the file and exit the text editor.
Step 5: Start Snippet Box using Docker Compose
With the docker-compose.yml file in place, you can now start the Snippet Box service.
Run the following command to build and start the containers:
docker-compose up -d
This command tells Docker Compose to start the services defined in the docker-compose.yml file. The -d flag runs the containers in detached mode, allowing them to run in the background.
Docker Compose will pull the necessary Docker images, create the containers, and start the Snippet Box service. This process may take a few minutes, depending on your internet connection and server performance.
Step 6: Verify the Snippet Box installation
After the command completes, you can verify that the Snippet Box container is running by using the following command:
docker ps
This command lists all running Docker containers on your system. You should see the Snippet Box container listed, indicating that it is running successfully.
Step 7: Access Snippet Box
Now that the Snippet Box service is running, you can access it through a web browser. Open your preferred browser and navigate to the following URL:
http://SERVER_IP:5212
Replace SERVER_IP with the IP address of your server. If everything is set up correctly, you should see the Snippet Box web interface. You can now start organizing and managing your code snippets.
Conclusion
Using Docker Compose makes installing and configuring Snippet Box straightforward and efficient. By following the steps outlined in this article, you can quickly set up a self-hosted Snippet Box instance. This setup allows you to organize your code snippets effectively and ensures they are always accessible.

Thank you for reading the article! If you found the information useful, you can donate using the buttons below:
Donate ☕️ with PayPalDonate 💳 with Revolut


