
How to Install Umami on Docker with Docker Compose

Umami is a lightweight, privacy-focused web analytics tool designed to be simple yet powerful. It provides an alternative to the heavy and privacy-invading analytics platforms commonly used today. Umami is open-source, free, and allows you to maintain full control over your data. One of the easiest ways to deploy Umami is by using Docker, a platform that automates the deployment of applications inside containers. Docker Compose, an additional tool, simplifies the process of managing multi-container applications. In this guide, we’ll go through the detailed steps to install Umami using Docker and Docker Compose.
Prerequisites
Before starting the installation process, ensure that your environment meets the following prerequisites:
- A Linux-based server: Ubuntu or CentOS are commonly used, but other distributions will work as well.
- Docker installed: You should have Docker installed on your system.
- Docker Compose installed: Docker Compose should also be installed.
Step 1: Setting Up the Directory Structure
First, create a directory to hold the Docker Compose configuration file and any other related files. This makes it easier to manage the Umami installation.
mkdir umami-docker cd umami-docker Step 2: Creating the Docker Compose File
Next, create a docker-compose.yml file inside the umami-docker directory. This file will define the services that are required to run Umami.
nano docker-compose.yml Add the following content to the docker-compose.yml file:
version: '3.9'
services:
  umami:
    image: ghcr.io/umami-software/umami:postgresql-latest
    container_name: umami
    ports:
      - "3993:3000"
    environment:
      DATABASE_URL: postgresql://umami:umami007@db:5432/umami
      DATABASE_TYPE: postgresql
      APP_SECRET: CezarMezar007CezarMezar007CezarM
    depends_on:
      - db
    restart: on-failure:5
    networks:
      - umami-network

  db:
    image: postgres:15-alpine
    container_name: umami-db
    environment:
      POSTGRES_DB: umami
      POSTGRES_USER: umami
      POSTGRES_PASSWORD: umami007
    volumes:
      - /root/dockeri/unami/db:/var/lib/postgresql/data:rw
    restart: on-failure:5
    networks:
      - umami-network

networks:
  umami-network:
    driver: bridge
Explanation of the Docker Compose File
- version: ‘3.8’: This specifies the version of the Docker Compose file format. Version 3.8 is compatible with most Docker installations.
- services: Defines the services that will be running in the application.
- umami-db: This service is for the PostgreSQL database, which Umami uses to store data.
- image: Specifies the Docker image to use (in this case, PostgreSQL version 14).
- container_name: The name of the container.
- environment: Sets environment variables for PostgreSQL. These include the database name, user, and password.
- volumes: Defines a volume to persist database data outside the container.
- networks: Specifies the network to which the container should connect.
- umami: This service is for the Umami application itself.
- image: Specifies the Docker image for Umami.
- container_name: The name of the container.
- environment: Sets environment variables for Umami, including the database connection string and a hash salt for security.
- ports: Maps the container’s internal port 3000 to the host machine’s port 3000.
- depends_on: Ensures that the Umami container waits for the database container to start before it attempts to start.
- networks: Specifies the network to which the container should connect.
- umami-db: This service is for the PostgreSQL database, which Umami uses to store data.
- volumes: Defines the Docker volume that persists the PostgreSQL data.
- networks: Defines a custom network that allows the containers to communicate.
Step 3: Starting the Services
With the docker-compose.yml file in place, you can now start the Umami services. Docker Compose will automatically download the necessary Docker images, create the containers, and start them.
docker-compose up -d The -d flag runs the containers in detached mode, meaning they will run in the background.
Step 4: Verifying the Installation
To ensure everything is running smoothly, you can check the status of your containers using the following command:
docker-compose ps You should see two containers: umami-db and umami, both with a status of Up.
Access the Umami Web Interface
Now that Umami is running, you can access its web interface.
Open your web browser:Navigate to https://your_server_ip:3999.
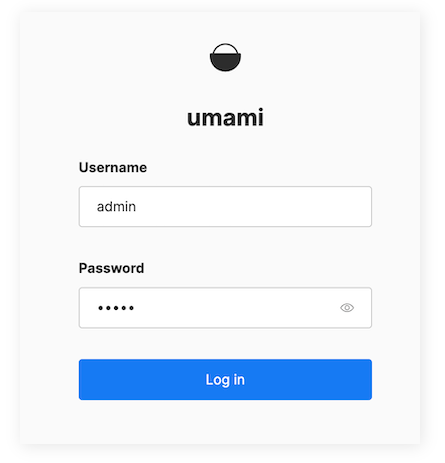
Your Umami installation will create a default administrator account with the username admin and the password umami.
Additionally, you can view the logs to verify that there are no errors:
docker-compose logs -fConclusion
Installing Umami on Docker with Docker Compose is a straightforward process that offers flexibility, scalability, and control over your web analytics. By following this guide, you should now have a fully functional Umami instance running on your server. Docker and Docker Compose make it easy to manage and scale your services, ensuring your Umami instance is always running smoothly. Don’t forget to secure your installation and regularly back up your data to maintain the integrity of your analytics.

Thank you for reading the article! If you found the information useful, you can donate using the buttons below:
Donate ☕️ with PayPalDonate 💳 with Revolut


