
Mastering Subnets in Ubuntu AWS: A Guide to Public and Private Subnets
Creating public and private subnets in Ubuntu on AWS is a crucial step in setting up a secure and scalable cloud environment. Subnets allow you to partition your Virtual Private Cloud (VPC) into separate sections, where resources can be grouped according to their function and security requirements. In this article, we will walk through the process of creating public and private subnets on AWS using Ubuntu, covering each step in detail.
Introduction to AWS Networking
Before diving into the subnet creation process, it’s essential to understand some basic concepts related to AWS networking:
Virtual Private Cloud (VPC)
A VPC is a virtual network dedicated to your AWS account. It allows you to isolate your resources and control the inbound and outbound traffic. Think of it as your private data center in the cloud.
Subnets
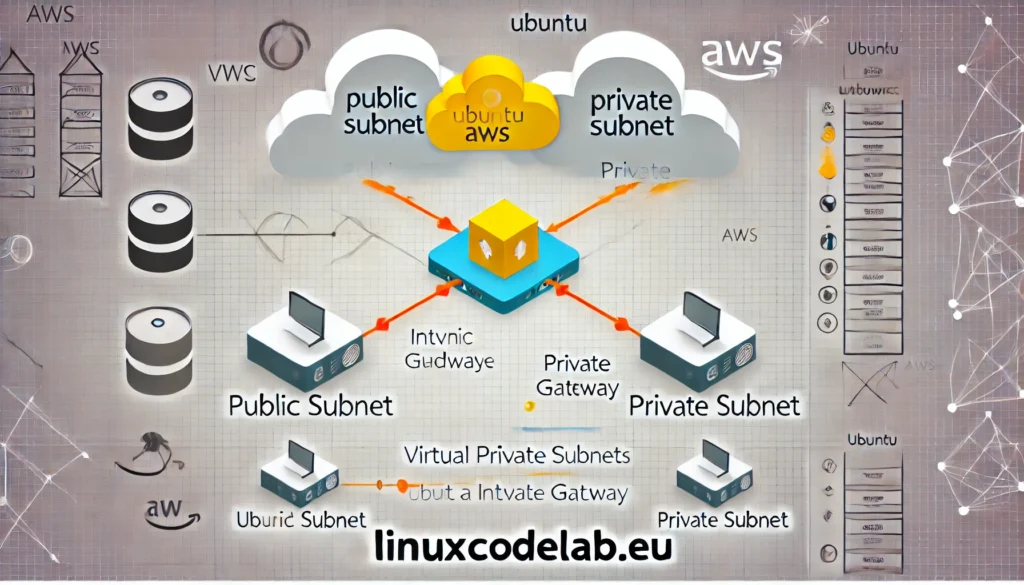
Subnets are segments of a VPC’s IP address range where you can launch AWS resources. Subnets can be either public or private:
- Public Subnet: Resources in a public subnet can communicate with the internet through an internet gateway.
- Private Subnet: Resources in a private subnet cannot directly access the internet but can do so through a Network Address Translation (NAT) gateway or NAT instance.
Internet Gateway
An Internet Gateway allows resources in your VPC to communicate with the internet. It must be attached to your VPC to allow public subnets to route traffic to and from the internet.
NAT Gateway
A NAT Gateway allows resources in a private subnet to connect to the internet without exposing them to inbound traffic from the internet.
Prerequisites
Before starting, ensure you have:
- An AWS Account: Sign up if you don’t have one.
- AWS CLI Installed: Follow the AWS CLI installation guide.
- Basic Understanding of Networking: Familiarity with IP addresses, CIDR notation, and routing is beneficial.
Step 1: Set Up a VPC
First, we need to create a VPC that will contain our subnets.
1.1 Create a VPC
Open the AWS Management Console and navigate to the VPC Dashboard. Click on “Create VPC”.
- Name Tag: Give your VPC a name.
- IPv4 CIDR block: Enter an IP range (e.g.,
10.0.0.0/16). - Tenancy: Choose “Default” unless you have specific requirements for dedicated instances.
Click “Create” to finalize your VPC.
1.2 Create an Internet Gateway
Next, we need to create an Internet Gateway to allow communication between our VPC and the internet.
- Navigate to “Internet Gateways” in the VPC Dashboard.
- Click “Create Internet Gateway” and give it a name.
- Attach the Internet Gateway to your VPC by selecting “Actions” > “Attach to VPC”.
Step 2: Create Subnets
Now that we have a VPC and an Internet Gateway, we can create our public and private subnets.
2.1 Create a Public Subnet
- Go to “Subnets” in the VPC Dashboard and click “Create Subnet”.
- Name Tag: Enter a name for your public subnet.
- VPC: Select the VPC you created earlier.
- Availability Zone: Choose an Availability Zone (e.g.,
us-east-1a). - IPv4 CIDR block: Enter a range (e.g.,
10.0.1.0/24).
Click “Create” to finish creating the public subnet.
2.2 Enable Auto-Assign Public IPs
To ensure that instances launched in the public subnet can communicate with the internet, enable automatic public IP assignment.
- Select the public subnet, click “Actions” > “Modify auto-assign IP settings”.
- Check “Enable auto-assign public IPv4 address” and save.
2.3 Create a Private Subnet
Follow the same process to create a private subnet:
- Name Tag: Enter a name for your private subnet.
- VPC: Select the same VPC.
- Availability Zone: Choose the same Availability Zone or a different one if you prefer.
- IPv4 CIDR block: Enter a different range (e.g.,
10.0.2.0/24).
This subnet will not automatically assign public IPs, as it’s meant to be private.
Step 3: Configure Route Tables
With the subnets in place, the next step is to configure route tables to control the flow of traffic.
3.1 Create a Route Table for the Public Subnet
- In the VPC Dashboard, navigate to “Route Tables”.
- Click “Create Route Table” and give it a name (e.g., “Public Route Table”).
- VPC: Select your VPC and create the route table.
Now, associate this route table with your public subnet:
- Select the route table, then click “Actions” > “Edit Subnet Associations”.
- Select your public subnet and save.
3.2 Add an Internet Gateway Route
To allow traffic to and from the internet, add a route to the Internet Gateway:
- Select the public route table and go to the “Routes” tab.
- Click “Edit routes” > “Add route”.
- Destination: Enter
0.0.0.0/0(which means any IP). - Target: Select your Internet Gateway.
Save the route.
3.3 Create a Route Table for the Private Subnet
Repeat the process to create a route table for the private subnet:
- Name Tag: Name it (e.g., “Private Route Table”).
- VPC: Select the same VPC.
Associate this route table with the private subnet:
- Select the route table, click “Actions” > “Edit Subnet Associations”.
- Select your private subnet and save.
3.4 Add a NAT Gateway Route (Optional)
If instances in the private subnet need internet access (e.g., for software updates), you’ll need a NAT Gateway.
- Navigate to “NAT Gateways” in the VPC Dashboard.
- Click “Create NAT Gateway”.
- Subnet: Choose the public subnet (since NAT Gateways need internet access).
- Elastic IP Allocation ID: Allocate or choose an Elastic IP.
Once the NAT Gateway is created, update the private route table:
- Select the private route table, go to “Routes” > “Edit routes”.
- Destination: Enter
0.0.0.0/0. - Target: Select the NAT Gateway.
This setup allows instances in the private subnet to access the internet for outbound traffic while remaining inaccessible from the outside.
Step 4: Launch Instances
With the networking setup complete, you can now launch instances in your public and private subnets.
4.1 Launch a Public Instance
- Navigate to the EC2 Dashboard and click “Launch Instance”.
- AMI: Choose an Ubuntu AMI.
- Instance Type: Choose a suitable instance type (e.g.,
t2.microfor free-tier usage). - Network: Select your VPC.
- Subnet: Choose the public subnet.
- Ensure “Auto-assign Public IP” is enabled.
Configure other settings as needed and launch the instance. It should have internet access.
4.2 Launch a Private Instance
Repeat the process, but select the private subnet this time. The instance won’t have direct internet access unless configured to use the NAT Gateway.
Step 5: Secure Your Subnets
Security Groups and Network ACLs (Access Control Lists) provide additional layers of security for your subnets.
5.1 Configure Security Groups
Security Groups act as virtual firewalls for your instances. You can define inbound and outbound rules to control traffic.
- Create a security group for your public instances allowing SSH (port 22) from your IP and HTTP (port 80) or HTTPS (port 443) for web access.
- Create another security group for private instances, allowing traffic only from the public subnet (if needed).
5.2 Configure Network ACLs
Network ACLs are optional but provide more granular control at the subnet level.
- Create an ACL for your public subnet allowing inbound HTTP/HTTPS and SSH traffic.
- Create an ACL for your private subnet, restricting all inbound traffic except necessary internal traffic.
Conclusion
Setting up public and private subnets in an Ubuntu AWS environment requires careful planning and execution. By following the steps outlined in this article, you can create a secure, scalable network architecture that takes full advantage of AWS’s capabilities. Public subnets allow your instances to communicate with the internet, while private subnets keep your most sensitive resources isolated and protected. Proper configuration of route tables, NAT Gateways, and security settings ensures that your cloud environment remains robust and secure, meeting the needs of modern applications.

Thank you for reading the article! If you found the information useful, you can donate using the buttons below:
Donate ☕️ with PayPalDonate 💳 with Revolut


